Chapter 6: Analog values as output
Analog values as output: PWM
As we have seen in earlier chapters, the Arduino is only capable of putting out a few different voltage values: either 5V or 3.3V. All of the I/O pins on the Arduino are set to output 5V when used to control circuit components. If the Arduino is only capable of producing 5V on our output pins, how can we create analog values? The Arduino has the built in capacity to use a technique called pulse width modulation, or PWM
pulse width modulation – a technique the Arduino uses to write analog values.
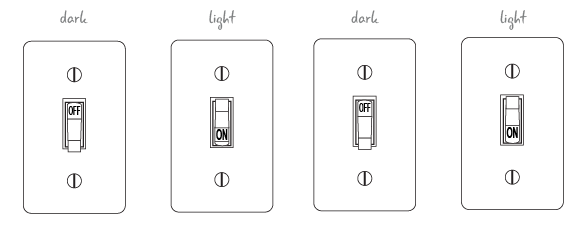
So how does PWM work? Imagine turning the lights on and then off in your room. The room looks bright for a moment, and then dark again. If we continue to flip the light switch back and forth at a slow rate, the room just appears to be bright, then dark over and over.

But something strange happens when we flip the light switch faster and faster. Rather than just appearing bright followed by dark, our room will have a light level somewhere in between the bright and dark. In fact, the room will also appear brighter if we leave the light on for slightly more time than we leave it off. Our room will have a light level that is the average brightness that is dependent on the percentage of time that the light is on in relation to the percentage of time the light is off.
PWM uses a technique similar to flipping the light switch to create a brighter or dimmer light level. When using PWM on the Arduino, the level of voltage on the PWM pin is switched on and off at various rates at a regular intervals. It is sometimes 0 volts, sometimes 5 volts.

PWM creates an average value by turning the pin off and on very quickly
By varying the amount of time the pin is turned on to 5V and off, the Arduino creates an average voltage value between 0 and 5.
Where are the PWM pins?
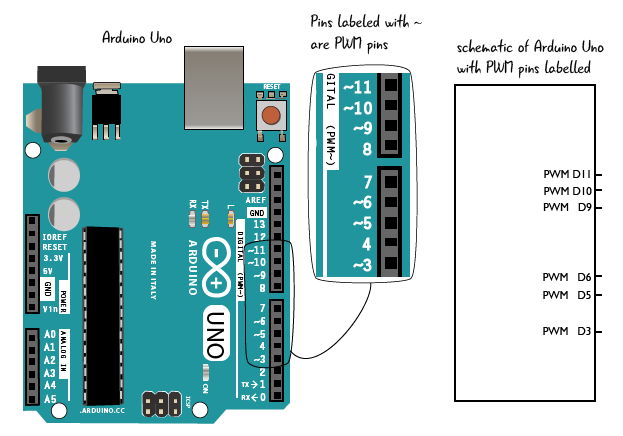
So which pins can we use with PWM? A number of the digital pins on the right side of the Arduino can be used with PWM: pins 3, 5, 6, 9, 10 and 11. As you can see, each one of the pins is marked by the ~ symbol on the Arduino.

Questions?
Q: Are PWM and analogWrite the same thing?
A: No, PWM and analogWrite are related but they are not the same thing. analogWrite is an Arduino function that tells the Arduino to use a pin to create analog values. This function uses the technique of PWM to create analog values.
Q: PWM turns the pins on and off, and that makes a different value somehow?
A: That’s right. Since the Arduino is turning the pin on and off so quickly, the effective value for the voltage that comes out of the pin is the average time the pin is on. Note that the Arduino is not producing a different value of voltage, but rather just using this trick of averages to create the analog value.
Q: The PWM pins can also be used as digital pins?
A: That’s right. Depending on your circuit and your sketch, you can use pins 3, 5, 6, 9, 10, and 11 either as digital pins or PWM output pins.
ATG6_AnalogSerial loop continued
We’ve seen how the sketch works with the Arduino to take in information from the potentiometer, change it, then send it to the pin controlling the LED. Now let’s look at how and why we print values to our computer with Serial communication. Here’s the second to last step the sketch performs:
4. prints two values to our computer (the value from an analog input pin and the value we send to the LED pin) so that we can see how they change over time
Why do we need to see Arduino input and output information on our computer?
Sometimes it’s helpful to find out information about how our sketch is running. This information can be useful if we’re trying to debug our circuit. For example, we can see the values we have on our input and output pins. We’ll see how we do this in a page or two.
What does Serial mean?
Serial in this context is a type of communication protocol. It refers to a way that two devices can communicate by sending information across a wire. By changing the value of voltage along a wire from HIGH to LOW, the Arduino can transmit information across the USB cable to our computer.

Serial communication is an easy and efficient method for our Arduino to communicate with our computer. The Arduino IDE contains a window called the serial monitor which displays the information it receives from the Arduino, such as the values our sensors detect or what function is currently running.
We will take a look at the serial monitor first before getting back to our code.