Chapter 5: Switches, LEDs and more
Let’s make our projects interactive!
We’re going to learn how to make our projects interactive, first by adding a button to turn an LED on and off. Then we will attach a speaker to our Arduino, and control sound and light with our sketch. Finally, we’ll add two more buttons, building a keyboard instrument, on which you can play simple tunes. Throughout these projects, we’ll learn more about programming the Arduino. In order to complete the projects in this chapter, you need to have the Arduino IDE installed, know how to connect a breadboard to your Arduino, and be familiar with writing a sketch and uploading it to your Arduino.
Interactivity!
In Chapter 3, we learned how to connect our Arduino to a breadboard to build a circuit that lit up an LED in an SOS pattern. The LED turned on and off, over and over and over again, always in the same pattern. Wouldn’t it be great if we could build a circuit that would respond to the user’s action?
We’re going to do that in this chapter, by building a mini-keyboard instrument with three buttons, a speaker and an LED. The speaker will play a different tone depending on which button you push, so you can play a tune. And the LED will turn on whenever you push any of the buttons. We’ll start with a circuit with an LED and a button and build on to that. Here’s a preview of what the finished circuit will look like.
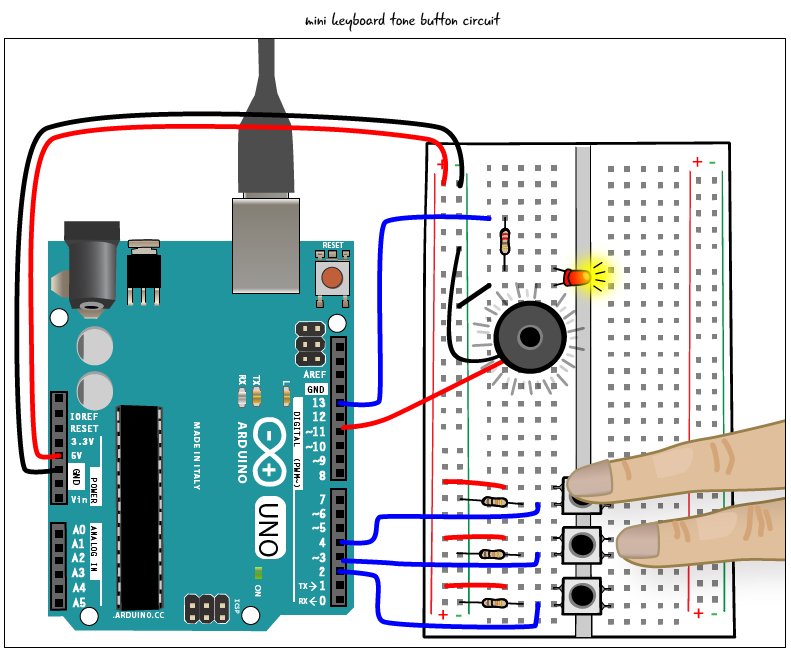
Just as in the Chapter 3, our project will consist of an Arduino and breadboard circuit with code written in the Arduino IDE. We’ll go over building the circuit and all of the code in the sketch step by step. In this chapter, we will also learn a bit more about reading schematics.

This project uses digital inputs and outputs. You used a digital output, an LED, in the last chapter. Before we start to build, let’s look more closely at what we mean by digital input and output.
Digital Inputs and Outputs Overview
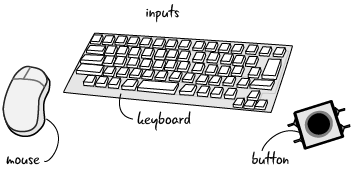
Think of your computer: how do you get information into it? You may use a mouse, you probably use a keyboard. Keyboards and mice are both examples of inputs. You can attach many different types of inputs to your Arduino. In this chapter we will attach buttons to the Arduino as inputs.

What do we mean by output? Again, think of your computer. You might have speakers attached to it, or a monitor or printer. Those are all examples of output devices. An Arduino can have many different types of outputs attached to it. In fact, you have already used an output device with the Arduino: the LED you connected to it in the last chapter.
For now, think of digital inputs and outputs as component that have only 2 possible states: on or off. Inputs send messages to the computer. Outputs receive messages from the computerWe will explain this in more detail later in the chapter.
Before we start building our circuit, let’s look at the schematics for a button or switches. Doing so will help us understand how digital input works.
Switches
There are a million different ways to trigger electronic devices or turn something on. Switches and similar on/off devices activate everything from televisions, to music equipment, lights, even your kitchen appliances. How does a switch work?
All switches work on the same basic principle: it either “closes the circuit” and turns something on, or “opens the circuit” and turns something off. When the switch is closed, electricity can flow through; it cannot flow through when the switch is open. The schematics for a switch illustrate how this works:
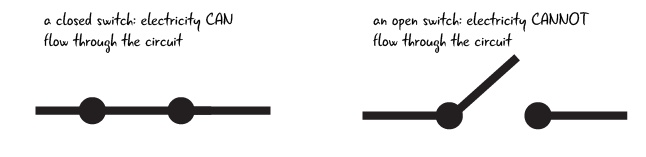
Like all digital inputs, as we saw above, switches have only two possible states: on and off. In the Arduino IDE, on and off (respectively) are equivalent to high and low. (Recall how, in the SOS circuit in Chapter 3, the light turned on when you set it to High, and off when you set it to Low.) Each key on a keyboard is actually a switch, set in the low position until pressed down where it goes to high.
Buttons are one type of switch. For our circuit, we will use a pushbutton , which closes and completes the circuit when you press it. As soon as you let go, the switch opens again and the circuit is no longer complete.