Chapter 5: Review
Reviewing code concepts
We learned a few new, and very important, programming concepts in this chapter. These concepts are critical to writing code in all programming languages, though the details might be a little different than in the Arduino language. Let’s look once more at variables and conditionals.
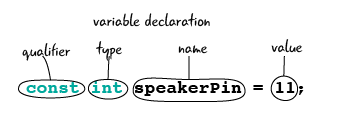
variables
A variable is a container in your code that can hold different values.
conditional statements
A conditional statement evaluates a condition and executes instructions if that condition is true . If the conditional statement contains an optional else if or else block, then it can test for multiple conditions, and it sometimes tells the code to do something if the conditions are NOT true.

Let’s take a quick look at how the electronic components we used in this chapter work in a circuit.
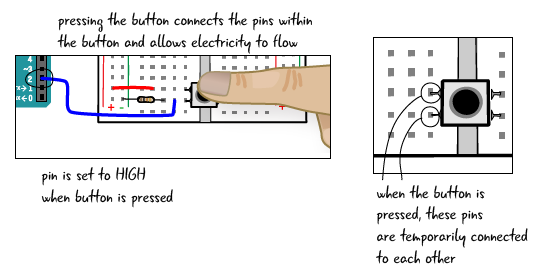
How does the button work?
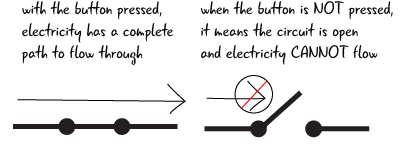
The default, unpressed state of the button is open, meaning electricity can’t flow through it. In order for electricity to flow through our button, it must be pressed down, making a connection between the pins. . When we read the value on the pin that is attached to the button, we will see that it is HIGH. There is nothing attached to the pins on the other side of the trench, but the pins on that side of the trench are also connected when the button is pressed.
How does the speaker play different notes?
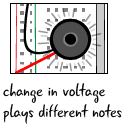
The tone() function built into the Arduino knows how to change the power provided by your digital pin to create different notes from your speaker. Without getting too technical, the note value you include in your tone function tells the Arduino how to rapidly change the voltage to create different notes.
Chapter summary
This chapter taught us more about programming. We learned what a variable is and how to use it, and how to use conditional statements to control the flow of our program. We also learned more about digital output, and how to add a digital input to our circuit to make our project interactive.
In the next chapter, we will learn how to attach analog sensors or other inputs to a circuit and use the information we gather from them to create more subtle experiences with our output components.