Chapter 6: Adding the speaker
Adding the speaker
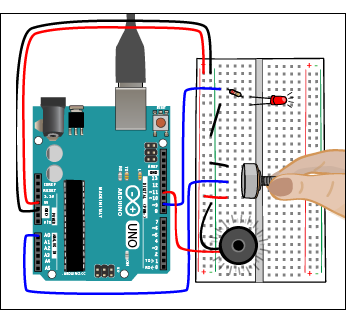
We’re going to keep all the components that are currently in our circuit and add a speaker. Both the LED and the speaker will use the values produced by turning the potentiometer to control their behavior.
Part to add
- 1 speaker

Connect one end of the speaker to pin 11, the other to ground. Remember, the speaker doesn’t have any orientation.

Once you’ve added the speaker to the circuit, attach you computer to the Arduino and open up ATG6_AnalogSerial.
Updating our code
Save your sketch as ATG6_VariableResistorTone. We have to add two lines of code to use our speaker: in the initialization section, a variable to hold the value of the pin attached to the speaker, and in the loop section, a call to the tone() function. We’ll also comment each line to explain what it does. All of the lines are highlighted below:
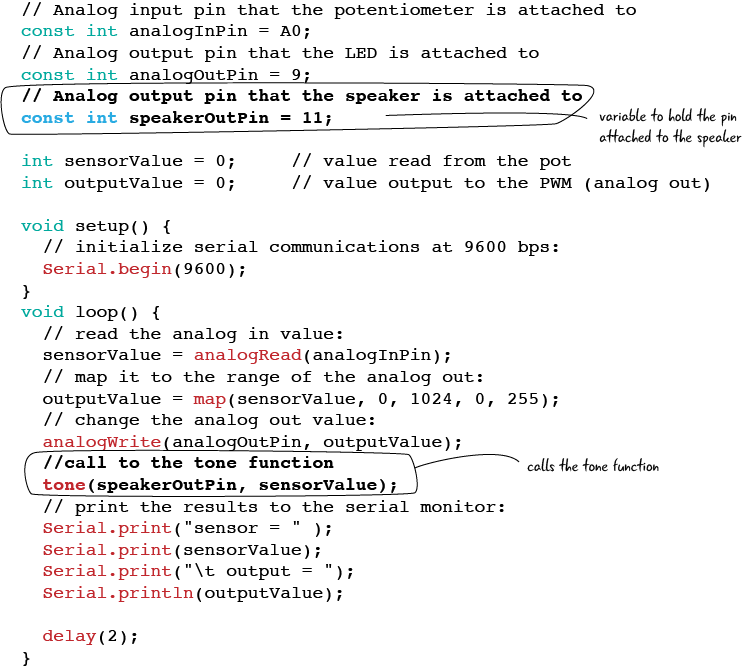
ATG6_VariableResistorTone
Once you have added those lines of code (initialized the variable to hold the speaker pin, call to the tone function, and commented each line), attach your computer to the Arduino. Verify, then upload your sketch.
Note again that we are using the potentiometer to set the pitch of the audio coming out of our speaker. As you turn it, the pitch changes, getting higher as the LED brightens, lower as the LED dims.
Before we move on to replace our potentiometer with a photocell to build the thermin, let’s take a closer look at the call to the tone function.
![]()
You may remember from chapter 5 when we used the tone() function that it takes 2 parameters, the pin the speaker is attached to, in this case the variable speakerOutPin (set to pin 11) and the frequency of the tone to be played, here set to the variable sensorValue, which is the value derived from reading the potentiometer on pin A0. We don’t need to map this value to the smaller scale. as the range of frequencies accepted by the tone function is much wider than 0-255.
Now that we’ve built our circuit with the potentiometer and the speaker, we will swap out the potentiometer for a photocell.