Chapter 2: Meet the circuit
Building your first circuit.
In the last chapter, we learned a bit about the Arduino and its parts. We also were introduced to some of the components and tools you will be using to complete the projects in this book. In this chapter, you will learn some of the electronics practice and theory you will need to know to build circuits using the Arduino. We won’t be using an Arduino just yet, but we will get back to that shortly.
The circuit: building block of electronics
The circuit is the basic building block for all of the electronics projects we will be building with the Arduino.
There are many different types of projects that you can build with an Arduino, you are only limited by your imagination. While there are many different types of projects, all of the projects we will show you on this site are all built using circuits.
First we will look at what a circuit is, then we will build our first circuit. We will also look at techniques for representing electronic circuits visually and learn how to test our circuits.
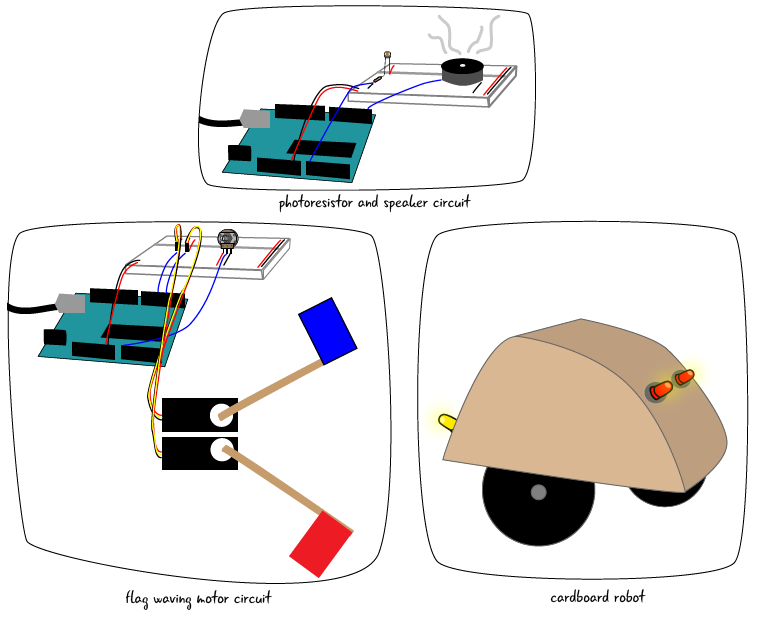
Here are some illustrations of Arduino projects. You can see that circuits can take different forms. In the cardboard robot, you can’t see the circuit, but a circuit is what is controlling the robot.
Let’s look more closely at what a circuit is.
Spotlight on the circuit:
What is a Circuit?
If you’ve ever been to or heard about a car race, you know that they refer to the track as a circuit. A circuit just means that there is a completed closed loop. The cars pass from the start line and end at the same place.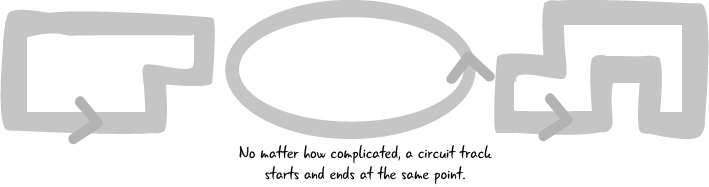
The same is true for electronic circuits. Electronic circuits describes a complete and closed loop. A circuit includes all of the electronic components required for a task as well as wires or another material which will let the electricity flow between the connected components.

Why are we making circuits?
Think for a moment about the light switches in your home as a model. In order to turn a switch on or off, you must be in physical contact with the switch. In our projects,the Arduino will be what is controlling the behavior of the electronic components. Our electronic components will be arranged in a circuit, and the Arduino must be part of that circuit in order for it to control the behavior.
Circuits allow the Arduino to connect to the electrical components, turning off and on a variety of objects (speakers, LEDs, motors, etc.) or learning something about what state they are in (“how hot is it?”, “how bright is it?”, etc). As long as we figure out how to have the Arduino connect to the object, we can control it with electricity and later, programming.
What makes up a circuit?
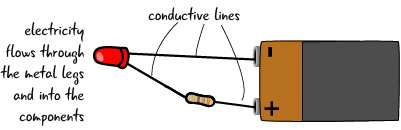
There are two main parts that make up a circuit: conductive lines and components.
Conductive lines:
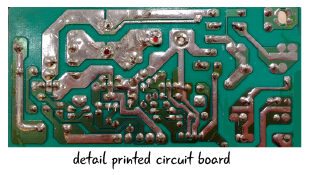
While most of the focus for a circuit is placed on the components, you cannot have a circuit without some sort of connection between the components. Our computers and electronic devices contain printed circuit boards, abbreviated PCB. Printed circuit boards are composed of base layers of material that do not conduct electricity onto which fine lines of conductive material have been applied. The conductive lines connect components that are soldered to the PCB. If you look at a printed circuit board, you will notice the shiny silver lines running between the components, connecting them. These lines are like wires stuck to a flat surface.
Components:
The other requirement for a complete circuit are components. We looked at a whole list of components to buy in the intro chapter. The components form the locations that need to be connected within a circuit.
Where do we begin?
The first circuit we are going to build is an LED bulb flashlight powered by a battery. This circuit is a great beginner project because the light turning on creates visual confirmation that the circuit is working. The flashlight circuit also demonstrates the basic techniques of circuit building we will need throughout all of the projects in the book.
Here is a drawing of the circuit when completed, with the parts annotated. We’ll explain what the parts do in detail, partially in this chapter and in forthcoming chapters as well. For now, know that this circuit will be built from an LED, a resistor, a jumper, a 9V battery and battery cap arranged on a breadboard, components you met in the intro chapter.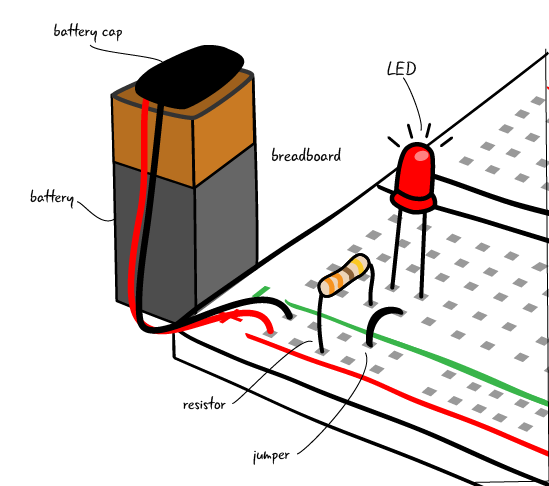
There are many different ways of representing or drawing circuits to convey the necessary information. In the illustration above, we have made an approximation of what the circuit will look like when you build it. This isn’t always the clearest way to see what is happening, as some circuits have a ton of parts. Schematics are a great way to make a drawing of a circuit that had simplified parts and showed how they connected together. Let’s take a closer look at how schematics work.