Introduction to Arduino
What is an Arduino?
Perhaps you have seen the Arduino at a local retailer, heard about it from a friend who purchased one, or just saw a cool project on the internet which piqued your interest. What is the Arduino? Most simply, it is an affordable, small-scale simple computer that focuses on interaction with the outside world.
Most of the computers you are familiar with are controlled almost exclusively through the keyboard and mouse (though some might have trackpads or touchscreens). An Arduino allows you to take information about the outside world through sensors that measure temperature, light and sound levels, or even the vibrations underneath you feet, and convert these measurements into motion, sound, light and more.
![]()
The Arduino was originally developed by teachers to make it possible for their design students who were not engineers to create interactive objects and environments. Since the original Arduino was released in 2005, it is estimated that over 1 million have been sold. Designers, educators, engineers, hobbyists, and students have built all kinds of projects that sense and respond to the world with Arduino.
There are many versions of the Arduino
Each is designed for a specific function. Here are photos of a few of them.

We have written this book in the spirit of the Arduino team. We don’t assume that you already know programming or electronics, we will show you what you need to know to get up and running with the Arduino. It will help if you are good at building and tinkering, and you have a determined nature.
What is included in this book?
We’ve included several Arduino project ideas to help you get started with electronics, using electrical components, building circuits and writing code for the Arduino. These projects are a jumping off point to help you realize the potential of the Arduino and to understand the building blocks required to make a successful project.
What can you do with an Arduino?
Remember, it can sense the environment and respond to it.
The Arduino does have some limitations!
Projects which require heavy computing power like extensive computer graphics or video, or
elaborate software driven projects will not work well on this platform.
The Arduino is part of the open source hardware movement. Let’s look at what that means.
What is Open Source Hardware?
![]()
The Arduino is defined on its website as an open source electronics prototyping platform. In the open source hardware movement, technologists share their hardware and software to foster development of new projects and ideas. Source designs are shared in the format that can be modified and whenever possible, readily available materials and open source tools are used to create the designs.
Here’s a quote from Statement of Principles on the website of the Open Source Hardware Association. (http://www.oshwa.org/definition/):
![]()
“Open source hardware is hardware whose design is made publicly available so that anyone can study, modify, distribute, make, and sell the design or hardware based on that design.”
By encouraging the sharing of resources, the open source hardware movement facilitates development of new products and designs. Open source projects emphasize the importance of documentation and sharing, making the community of users a great resource for learners.
Prototyping
The Arduino is a prototyping platform. What’s prototyping? It is building a model of a system. It can involve many phases, from initial sketches through detailed plans and a series of refinements to building a fully functional model that can be replicated. Or it can be a quick one off that’s put together rapidly to test an idea.
What will I need and where can I get it?
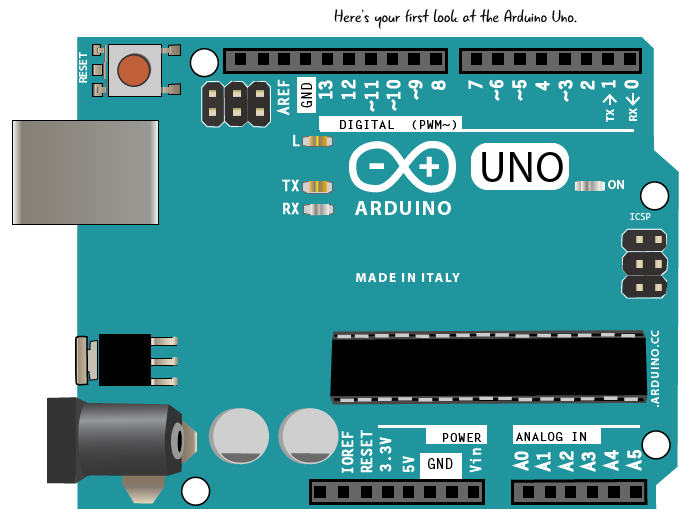
There are several versions of the Arduino as it has been around since 2005 and is constantly evolving. For the purpose of this book, we are concerned with the Arduino Uno. Your Arduino might not look exactly like this, as we have simplified the drawing in order to point out the sections that concern us. (We will review some of the different models of the Arduino in one of the appendices.) Since the Arduino is open source, you might also purchase a board that does not come directly from the Arduino organization. Just know that for this book we are focused on the Arduino Uno and compatible boards.
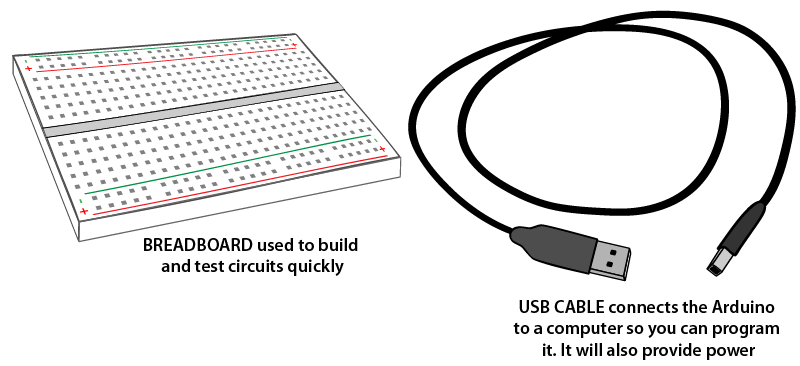
We will also need some additional electronic parts and a few tools to build projects with the Arduino. Here is a list of the parts you will need to purchase to complete all of the projects through Chapter 5. Information about the parts you will need will be included in the chapters after 5.
Parts List for Chapters 1 – 5:
- Breadboard
- USB A-B cable
- 9 volt battery
- 9-12 volt power supply
- 9 volt battery cap or holder
- Assorted LEDs, a variety of colors
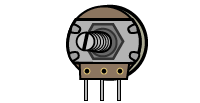
- Potentiometer
- Switches/buttons
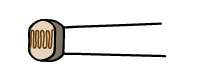
- Photo resistor
- Speaker
- Jumper wires
Here’s what the parts you’ll need look like, with a brief description. We’ll explain in more detail what each part does and how to use them as we complete all of the projects.
Electronic parts are often called components, because they are components in an electronic circuit. We’ll learn more about circuits in Chapter 2.


A note about the LEDs
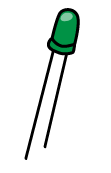
LEDs come in a variety of colors, styles, and sizes. We will use LEDs in many of the projects in this book because they help to demonstrate a number of basic electronics and Arduino concepts in a visual way.
One important thing to remember about LEDs which we will repeat thorughout the book, is that LEDs have a polarity, or direction in which they must be placed in order to work in a project. If we place the LEDs backwards, they won’t light up. How do we know the orientation of an LED?
LEDs have two legs, or leads, which are different length. The longer lead is know as the Anode, the side of the LED which we will connect to power. The shorter leg is named the Cathode, which will be pointed away from our power source. We’ll show you how to position the leads in a circuit when we start building one.

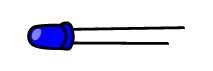
What happens if you have a used LED that has clipped leads? We can also look at the base of the LEDs plastic bulb. The lead which is connected to the side of the bulb which has a flat section is the ground. We will also be able to look inside of the LED bulb to make a distinction as to which side is power and ground.
Now let’s take a look at a few tools you will need to make these projects.
Tools:
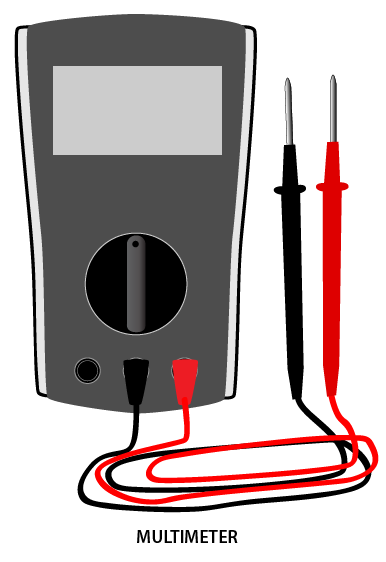
A multimeter will tell you everything you need to know about a particular circuit but cannot see involving the electrical properties of the circuit. We will show you how to use it in a future chapter. The meter depicted here is available from Sparkfun part number TOL-12966, but you may find another one that you like. When you choose a meter, make sure it has removable leads, that it is fused, and electronic.

Needlenose pliers come in handy for pulling components out of the breadboard when you wish to change the circuit around. They are also helpful for picking up small components.
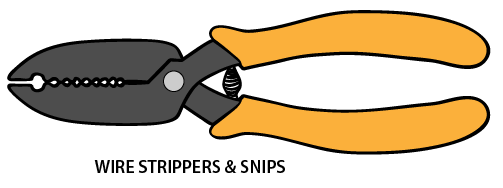
Wire strippers are used to pull off the plastic insulating coating found on various thickness of wire. They will make your life a lot easier when using spools of wire since you will be able to cut and use custom lengths of wire.
A word about tools: The Soldering Iron
You may be familiar with a soldering iron and its use in electronics to connect components. In this book we have elected to breadboard all of the circuits listed. This means that you are not required to purchase a soldering iron or learn how to use one to complete the projects in this book.
Questions?
Q: What does a Soldering Iron do?
A: A soldering iron is used to melt a conductive material (“solder”) to combine electrical components in a more permanent way. This process is called soldering.
Q: Why aren’t you teaching soldering in this book?
A: Soldering is a wonderful skill to have and will help you take your electronics to the next level, but for this book we were primarily concerned with the basics. You can make fully functional circuits without it.
Q: The list of components seems to have a lot of parts to it. The pictures look nice but do I really need to purchase all the items in that list?
A: You will be seeing a lot more of those pictures! To answer your question, the list of parts are required for the first half of the book, and will also be pivotal for the remainder of the book as you add new components. We will introduce what they do through the first set of chapters.
Q: My friend / sibling / parent / teacher / dog gave me a newer / older model of the Arduino. Do I have to use the Arduino Uno for the projects in this book?
A: Good question. The projects in the book might work with your particular Arduino, but both the programming and the abilities of the Arduino have changed over time AND differ based on the version. All of the examples in this book have been tested using the Arduino Uno and the latest release of the Arduino software.
Q: I don’t recognize or know how to use any of the tools or components you have shown, is there another book for me?
A: NO! This book is written for you. We will be covering specifics on how to use all of the parts and tools we have listed in the coming chapters. Sit tight and keep reading.
Q: I don’t have anywhere in my neighborhood to purchase those parts. Do you have any recommendations for places I can find those parts online?
A: Great question! You are ready for the next section.
Where do I purchase these things?
There are a number of vendors that sell the components that you will need. Here are the websites of many of them, there may be more in your community.

Maker Shed
Selection of kits and individual Arduino components. Some electronic parts, focused on the maker community.

SparkFun Electronics
Wide range of sensors & breakout boards, classic Arduinos and there homemade version
Adafruit Industries
Arduinos and breakout boards, sensors, electronic components

Jameco Electronics
Mostly electronics components, endless buttons / switches
Mouser Electronics
Some Arduino, tons of electronics, sensors, and other items
Digi-key Electronics
Great for ordering components, chips etc
Can’t I just order all the parts at the same time?
There are kits available from some of the vendors mentioned above that have most of the parts you will need to complete the projects in chapters 1- 5. In later chapters we will let you know the additional components you will need. Here’s a few of the kits available, you will find that there are many more.
A kit developed by the Arduino team. It can be purchased from a number of vendors.
http://arduino.cc/en/Main/ArduinoStarterKit
This kit is available from the Maker Shed.
http://www.makershed.com/products/getting-started-with-arduino-kit-v3-0
Adafruit Industries has a few kits, including this one.
http://www.adafruit.com/products/193
Summary
This chapter sets you up to start on the path to using your Arduino. By now you know where to get the required items, can identify various components and tools you will use, and know how something about the contributions of the open source movement.
The next chapter will look at the Arduino Uno in more detail, and show you how to hook it up to your computer.